Oy. Let’s just start off by acknowledging the fact that I am no good at this blogging thing. For a while there in the last couple of months, I considered just quitting altogether, but I’ve decided to buck up and continue to post stuff every now and then. So you’re stuck with me.
Today’s post is brought to you by this lovely pin. In our church, every summer we have what we call “Girls Camp” for our “Young Women” ages 12-18. Oh how I love Girls Camp! This year, I am lucky enough to be in charge of camp for the small group of young women in our congregation (ward). The theme the girls decided on was “Girl on Fire” from The Hunger Games. (We’re emphasizing being on fire with the spirit rather than kids being forced to kill each other, by the way.)
In my search for ideas, I came across a great blog post from Better Than We Deserve from when they did the same theme. One of my favorite things they did was their bleached out t-shirts:

After showing them to the girls, they decided they wanted to do the same thing, so I ordered a bunch of black t-shirts and when they came, I set about to do a test one, with all of the bleaching-a-design-on-a-t-shirt knowledge I had gleaned from the internets.

That was my SECOND try. (I didn’t even bother with pictures from the first one.) Not exactly what I was going for. So let’s just recap my failures here for moment, shall we.
Attempt numero uno: I used my trusty Silhouette Portrait to cut the stencils out of heavy card stock, and then used a spray adhesive to stick it onto the shirt and sprayed with a 50/50ish bleach/water solution. So much bleeding, you couldn’t even tell what the symbol was. At this point, I was kind of freaking out because we were supposed to do the shirts the next night, so I made a mad dash to Facebook (of course) and pleaded for all craft experts everywhere to help me.
Attempt numero dos: With some advice from friends, including the queen of freezer paper bleaching herself, I set out with confidence to try again. This time I cut some stencils out of freezer paper, ironed it onto the shirt, and sprayed straight bleach onto the shirt. Still bled like crazy (see above), but at least you could tell what the shape was, right? But the places where the bleach looks the strongest – yeah, there’s not supposed to be any bleach there.
We did something else with the girls that night and saved the shirts for later.
Attempt numero tres: I just didn’t get it, I seemed to be doing the same thing as I watched work in soooooo many videos and tutorials, and yet, crisp lines were out of my reach. But fear not, success is on the horizon. For my third attempt, I cut stencils out of transparencies, so the bleach couldn’t soak through the paper (even though it shouldn’t have with the freezer paper). I also found a spray bottle that had a more “misty” spray than the one I had been using. I used an only slightly diluted bleach solution, probably 2 or 3 parts bleach to 1 part water (I didn’t measure, just eyeballed it). I decided to forgo the spray adhesive and see what happened. And it worked!
Key things: Use a piece of cardboard in between layers of your shirt so the bleach doesn’t soak through to the other side. Make sure your spray is as misty as possible and DON’T OVERDO IT. I think this was one of my main problems the first couple of tries – I just sprayed waaaaay too much and soaked the shirt, so easy does it. You’ll start to see the bleach working in about 30 seconds or so. When your bleaching looks like you want it to, rinse that baby out right away and then wash it (on its own or with other things you’ve bleached), then dry it in the dryer and voila! Loveliness.
So last night, we finally had the girls do their shirts and I just love them. When I first started testing the bleach, I was disappointed that it didn’t make the shirts go white, like in the inspiration pictures. But, with the reddish/orangish/brownish hue that it DID turn, the shirts go well with the theme of being on fire, so I’ve changed my tune.
Here are a couple of the girls’ shirts:

I especially love how this one looks like it has smoldering embers across the bottom:
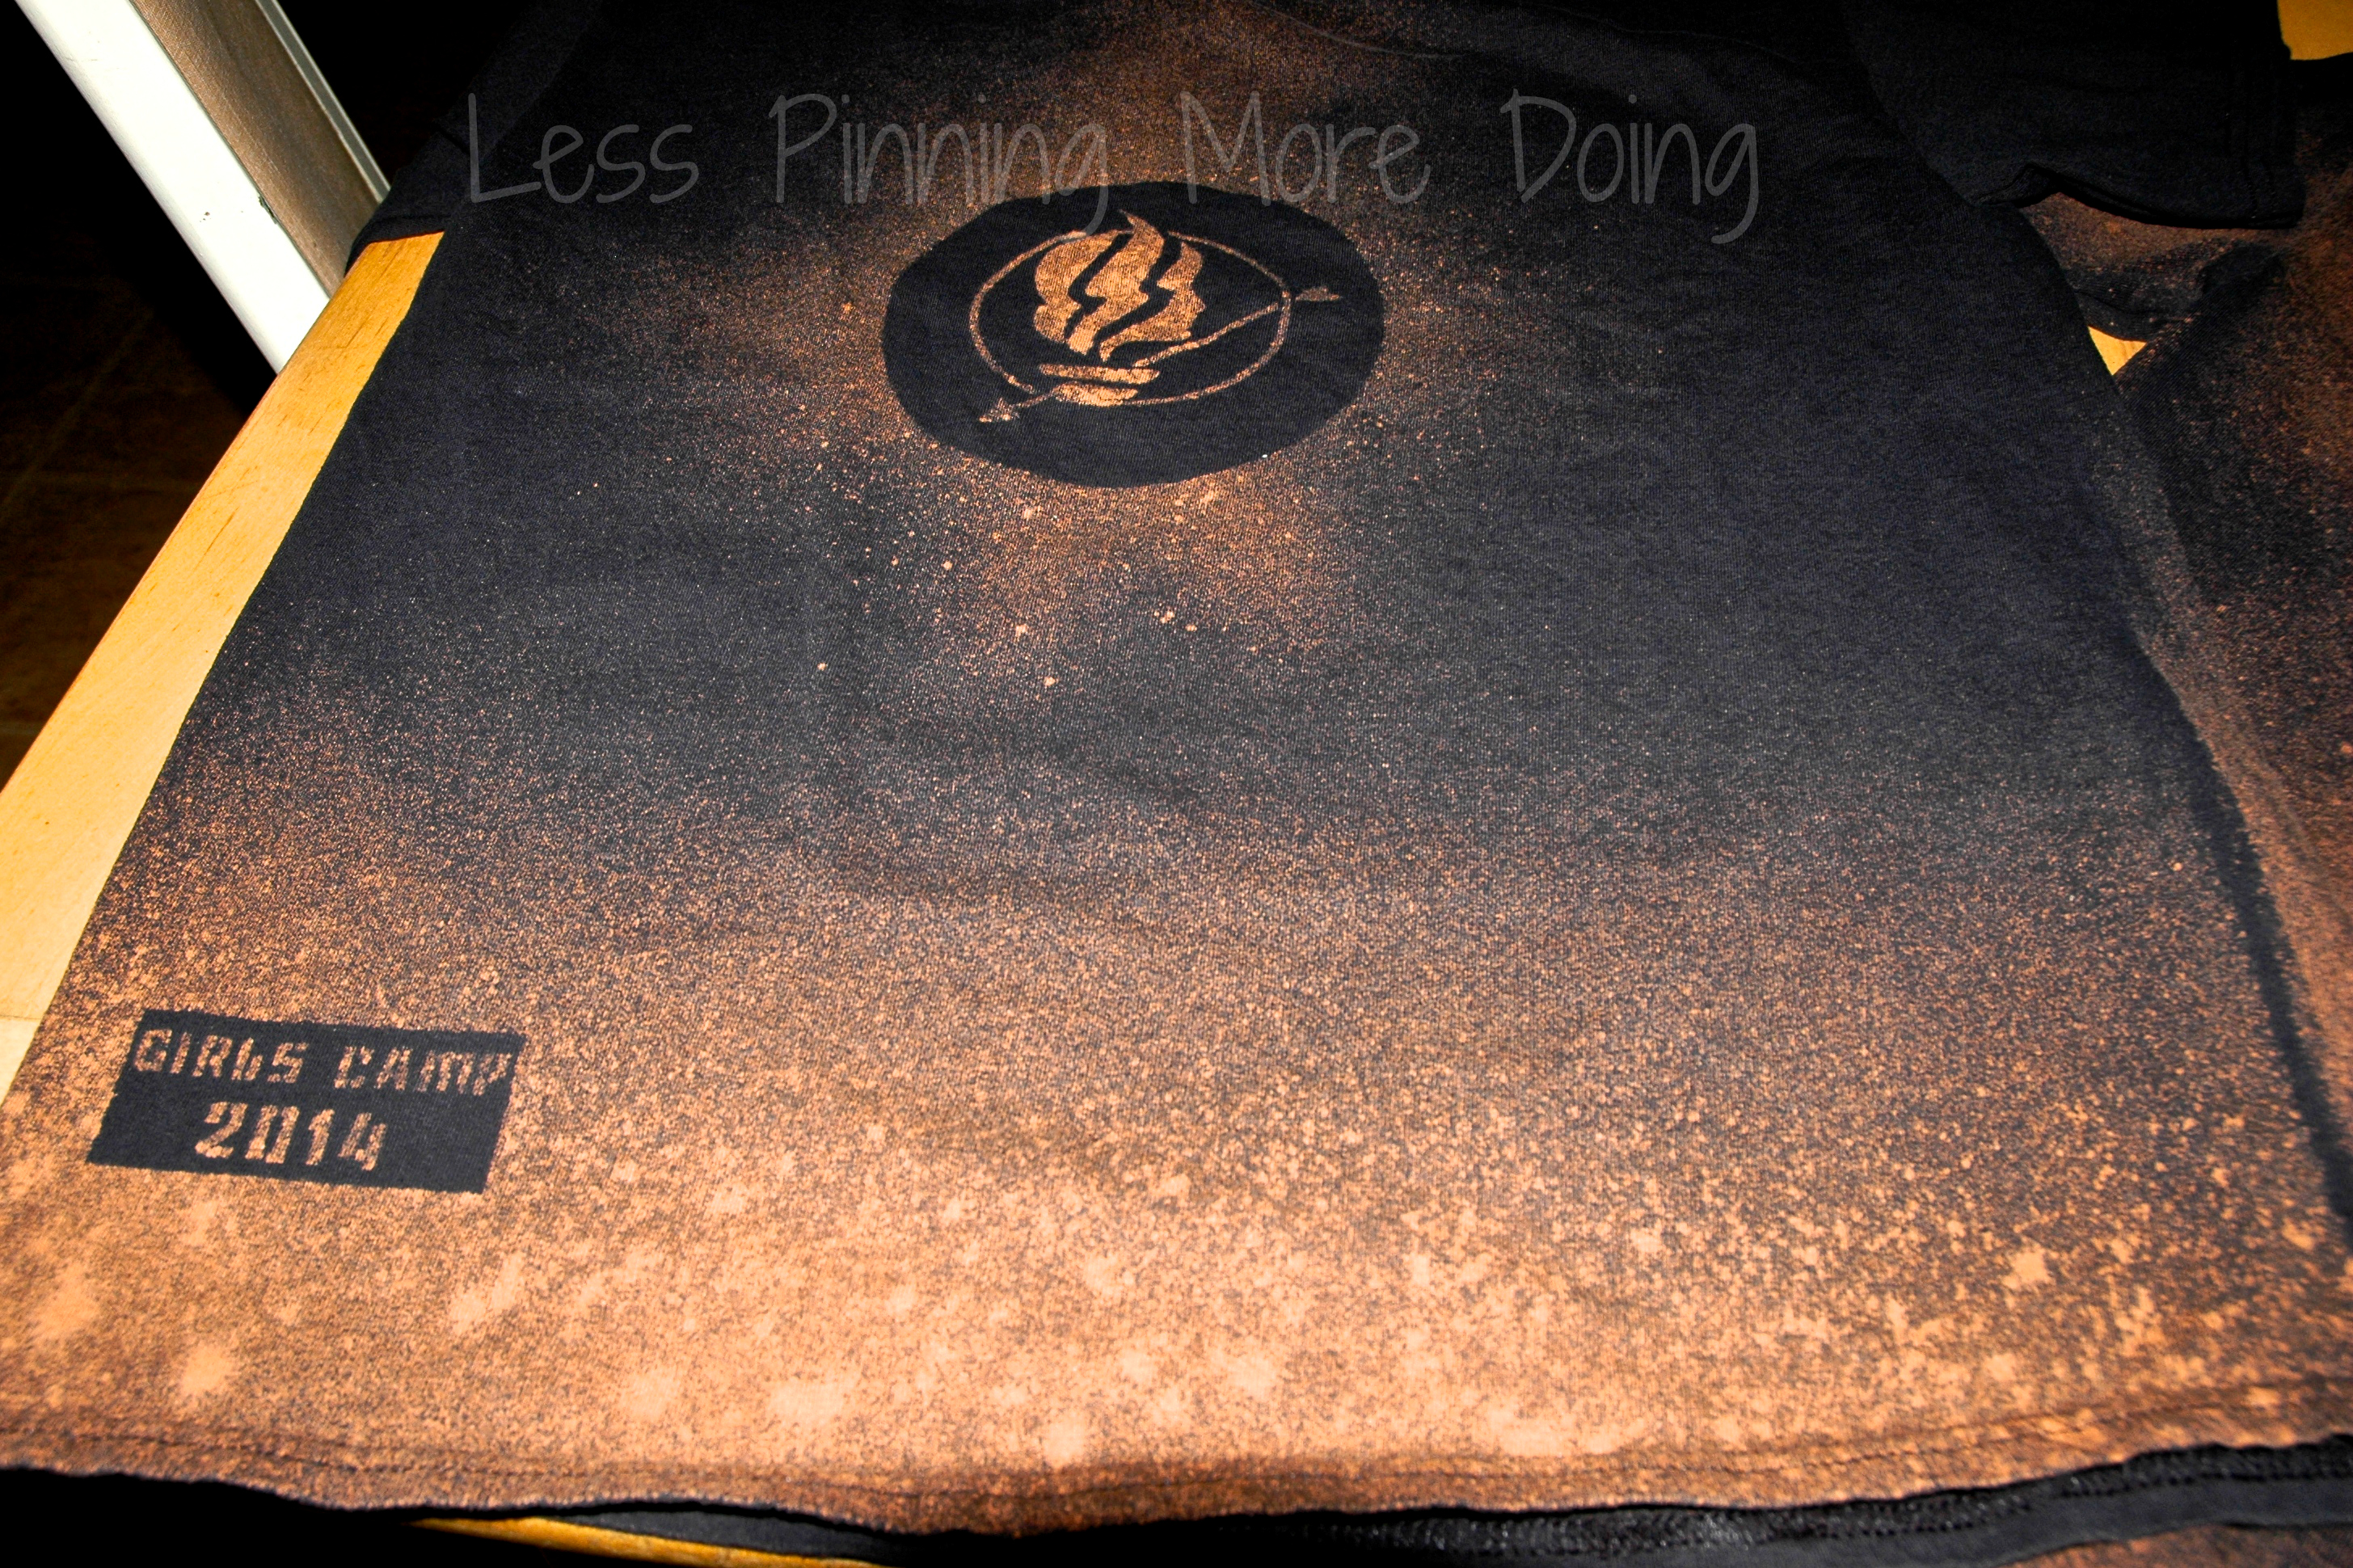
Here’s an up close view of the great logo one of our girls designed for us, combining the Young Women’s torch with the symbol of the mocking jay from the books:

I love that each of the girls have a unique shirt of their own design, but that there is also a unity between them through the colors and the stencils. We had a lot of fun making them!
We have some other fun things planned for camp, so once it’s over and done with, maybe I’ll share a post about what we did. If you’re lucky.
Do you have any tips for designing with bleach? Share with us in the comments!

