Tag Archives: organization

Ideas for a Happier Camping Trip

Standard

Today we’re talking camping again! But first, don’t forget to enter to win a free custom made just for you necklace! I’m up to 219 Pinterest followers and the give away will end when I hit 250, so enter and share with your friends!

Okay, let’s get back to camping, shall we? Since sharing my camping packing list with you, we have visited and returned from The Grand Canyon as well as spent a night camping in the middle of the Uintah mountains with some cousins. With those two trips using my list under my belt, I had to make a couple of modifications. Like adding a mallet so we don’t have to  use rocks to drive our tent stakes in next time (oops!) and deleting the sewing kit, which I didn’t even put in the tub anyway. Who sews when they’re camping? Certainly not me – that’s what the duct tape and bungi cords are for, right? If they can’t fix it, it can wait until you get home, I say.

Now that you’ve got a list ready to go, I want to share some tips and tricks for making a camping trip with kids more enjoyable for everyone.

CampingTips11

First, let’s start with packing, shall we?

*Start with a packing list.
You can make your own, or you’re welcome to use mine and modify it for your own needs, but use one. It makes it so much less likely that you will forget something important. Like a mallet. To drive in your tent stakes. But DON’T cross anything off that list until it is actually packed! Not even if you intend on going to grab that lantern right after you tie your 4 year old’s shoe for her because we all know that when you’re done with that and then cleaning up the milk your toddler spilled and answering your 7 year old’s question about why he has to pack a pair of underwear for every single day of the trip, you’re going to look at your list and see the lantern crossed off and move on to the next thing and then you’ll be lanternless in the woods. So just…cross things off as they get packed, okay?

*Pack clothes by the day.
I do this by laying out a pair of pants folded in half, and then the shirt half folded on top, and then socks and underwear on top of the shirt and rolling them all together in one bundle. I’ve seen others put each day’s outfit in a ziplock bag or folded together another way. The reason for this is that it keeps kids from digging through the bag looking for their clothes or a certain shirt. Just grab a bundle and you’re good to go.

*Buy a foldable laundry basket or 2 from the dollar store.
I found this tip on these great wide internets and I tell you what, it’s genius. All the dirty clothes go in the laundry hamper and the bag(s) have only clean clothes

*Pre-soap some sponges.
I bought a 6-pack of those cheap yellow sponges with the green scrubby part on top and cut them all in half. I squirted dishsoap on each one and let them dry in the sun before packing them in a ziplock bag together. We didn’t have to pack any extra dishsoap and worry about it opening or leaking and doing dishes was a breeze to just grab a sponge and go. Used sponges went in to a new bag and were rinsed/resoaped when we came home so they’re ready to go again for the next trip.

CampingTips15

*Make sure to pack a flower book or a bird book or a bug book or whatever floats your boat.
It is great fun (and shh! even educational!) for the kids to be able to observe and identify the things they find in nature.

When you get to camp…

*Set up first!
No ifs, ands, or buts, set up camp as soon as you get to your site. Get the work out of the way so you’re not hurrying to get that tent up and find everyone’s sleeping bags come bedtime. This is my #1 camping rule.

*Clearly set boundaries around camp.
Take some time to set boundaries for your kids around your campsite so they know where they can and cannot safely play.

Food…I only have two things to say about food

CampingTips4

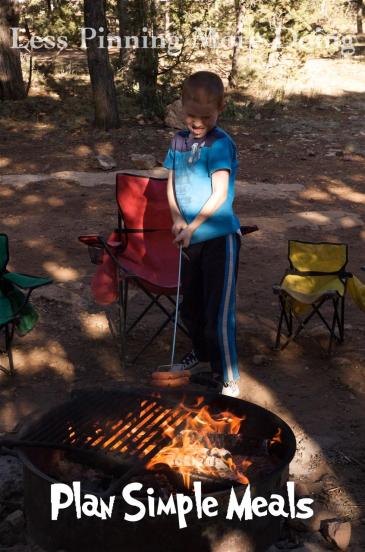
*Plan simple meals.
You don’t want to spend your whole day cooking and cleaning up. Roast hot dogs. Foil dinners. One or two dutch oven dinners if you’re so inclined. Whatever floats your boat, but keep it simple so you can enjoy your trip.

CampingTips7

*Make Banana Boats.
Everybody has s’mores camping, which are great and delicious and a must. But we’ve added a new must to the food list – oh the goodness of a banana, sliced down the center, stuffed with yummy things like chocolate chips and mini marshmallows and peanut butter chips and then wrapped in foil and cooked on the hot coals of a campfire! Divine! Some other great things to stuff inside would be those little caramel bits or nuts or toffee bits or even little mint chips. Just typing this makes me want one. Mmmmmmmm.

CampingTips6

Other tips for happy camping…

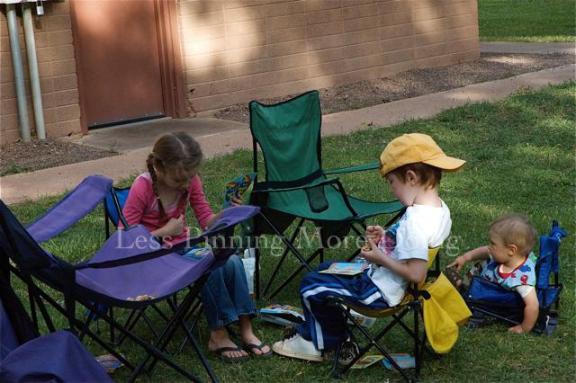
*Bring things for the kids to do.
My camping list includes a tub of kid-friendly activities. I didn’t include everything on the list, but used it as good place for ideas. One thing I put in there that they didn’t really care for was the cut up pool noodles. Just not their thing, I guess. What surprised me was how much my 2 year old loved the beads and pipe cleaners. He spent so much time just stringing them. So figure out what your kids would enjoy and bring it along for them so they can entertain themselves while you’re cooking or just relaxing around the campsite.

And along with that…
CampingTips13*Let kids be kids.
They will do things you wouldn’t, but they will learn to love the outdoors if you let them discover it in their own way.

CampingTips3

*Don’t be afraid of the dirt.
I mean, you’re camping in it. They’re going to get dirty. Let them. If you can just relax about it, they’ll be happier and so will you.

*But since they’re so dirty: no shoes in the tent!
This is my #2 rule, right behind setting up when you get there. Bring along a carpet remnant or something for outside the tent door where people can sit and take off their shoes.

*Wet wipes are your friend.
Bring them. And bring lots.

*Bring along some surprises.
I brought along glow bracelets for each night of our Grand Canyon trip. What kid doesn’t love a glow stick? We also had treats/snacks that we don’t usually have. Know what makes your kids happy and surprise them with it!

CampingTips12

CampingTips14

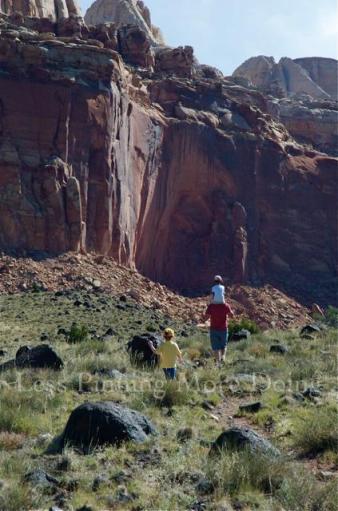
 *Enjoy and explore nature together.
That’s why you’re camping, isn’t it? So stop and watch the water skeeter flit across the pond. Break open the flower book and figure out what that pretty purple and yellow one is called. Spend a moment in awe of the big beautiful clouds. It’s good for you.

CampingTips10

 *Participate in a Junior Ranger Program.
Most (if not all) state and national parks have junior ranger programs for the kids. They learn a lot about a lot and if you have a kid like one of mine, they’ll just eat it up. So if you’re camping in a park, do it!

CampingTips5 *Have kids carry their own packs.
If you’re going to do any hiking, there’s no reason for you to haul around water and snacks for everyone else. Have a way for kids to carry things themselves. It gives them control and responsibility, which is good for everyone.

CampingTips8

 *Watch a sunset together.
They’re beautiful and awe inspiring. What other reason do you need?

CampingTips9

 *On at least one of your camping trips each summer, take a family picture outside.
You could ask a stranger to take it or bring a tripod and use your camera’s timer, but take one. You’re all going to be dirty and gross, but do it anyway. In all its imperfections, it will be a picture you love, I promise.

And last but not least:
*BE FLEXIBLE!
Things are not going to go the way you planned. The 3 year old and the 2 year old are going to whine on every hike and want Dad and only Dad to carry them or hold their hands. Somebody’s going to get hurt. The dutch oven meal isn’t going to cook as fast as you hoped. The toddler won’t sleep at night. It will rain and be too cold or not rain and be too hot. Just roll with it. Nature is unpredictable and that’s what makes it amazing so take things as they come and enjoy your trip!

Happy Campers

Standard

*If you’re here from Pinterest to see my camping checklist, check out my giveaway going on now and get in on the action!*

I am in the midst of preparing for a family camping trip to the Grand Canyon we’ll be taking later this summer. My family did a lot of camping growing up and I remember it as always being so much fun. I still enjoy camping an awful lot, but you know what? It’s a whole different beast when you’re the adult in charge of planning, packing, feeding, and keeping everyone alive for 4-5 days in the dirt!

Camping4

We’ve been on a few camping trips with our kids before, but I’m determined to make this one as low-stress as possible, especially since it will include a looooooooooooong drive before and after as well!

To that end, I’ve been searching out some tips and tricks for making our little roughing it stint a little less rough for mom {that’s me}. You can find links to a lot of good ideas, recipes, etc. here on my camping board.

Camping2

One thing that I haven’t used before but really want this year is an extensive packing list. I found a few different ones, but not one that fit just right, so I plunged through the lists buffet style, picking and choosing what looks pleasing to my palate and came up with my own list. My intention is to get a few big plastic tubs and fill them with our camping stuff by category and then just leave that stuff in there, making packing for future trips as easy as 1-2-3. And since I’m feeling ever so generous today, I turned it into a pdf to share with all of you! Don’t you feel lucky?

Camping1{apparently I am incapable of posting a picture of the pdf, so you’ll have to click on the above picture)

My list includes a kitchen tub (no food!), a general camping stuff tub, a keeping kids busy tub, personal bags, and all the other big stuff/equipment that you can’t fit into a tub. As should be pretty obvious from the size of the thing, this list is for car camping trips rather than backpacking trips. I mean, if the length of the thing didn’t give it away, the amount of clothing required for a 3 year old ought to.

Now that the list is made, all I have to do is make sure I’ve got it all and can fit it into the car. That’s the easy part, right? Right?!

Oh yeah, and figure out what to feed people…

PS – Check out my new post for some tips and tricks to make camping with kids more fun for everyone!

I Might Just Be Crazy

Standard

First off, I have about 1.2 million things that I’ve actually tried from Pinterest in the last…while, and I’ve even taken and uploaded the photos to document some of them so I can post about them here. And some day I might actually get around to doing that. But not this week.

This week I’m either going to prove to be SuperWoman or SuperCrazyLady. Quite likely it will be the latter.

Sooo…the husbandman is going to be MIA this week and I’ve had the awesome idea to surprise him when he gets back. By doing a little mini makeover in our bedroom. Only, the ideas in my head are turning out not to be so mini. Don’t get me wrong – I’m not planning on any demolition or anything. Most of my plans involve paint. Maybe some small use of power tools. Perhaps (but not likely) a very small amount of electrical work (for which I will probably use cookies to bribe a neighbor to tackle).

Oh yes, did I mention I have 4 children I’m supposed to feed and clothe and make sure they don’t kill each other as well? All under the age of 9? And a very naughty dog. In fact, in the writing of this post, I’ve been interrupted no less than 4 times. Yeah. Crazy.

Oh, and one more thing. I’m doing this makeover on a really not big budget. Like a my-husband-is-a-teacher-and-I’m-a-SAHM-and-he-doesn’t-know-I’m-spending-any-money-on-this budget. ::)

Fun, no?

The plan, so far as this blog is concerned, is to update every night with the things I’ve accomplished. Because I’m going to have so much time for blogging, I know. Like I said – crazy lady on the loose!

So, for your viewing pleasure, tonight you get the “BEFORE” pictures.

This slideshow requires JavaScript.

I must apologize for the bad lighting, but it’s a basement bedroom with one window (that happens to be under a deck), so you’ll have to take what you can get. As far as coloring, I would say the picture w/the 2 white doors (the entry and the bathroom) has the most accurate depiction of the current paint color. Something I fondly refer to as the tanish-greyish-neither-here-nor-there color that plagues all of the walls in our home. It’s being banished, though, one fortunate room at a time.

On tonight’s schedule – tape as much of the room as I can w/the small amount of painter’s tape we have. Make a decision about bedding since I’ll most likely be ordering it on line and get it ordered and hope it gets here FAST.

Now, in all honesty, I don’t believe I’ll get everything done that I’m wanting to before my main squeeze returns in 4 days (oh yeah – did I say a week up top? Because it’s really only 4 days), but I’m sure going to do my darndest to try!

DIY Crafty-looking Fabric Boxes

Standard

I have this thing for those cutesy canvas and/or other fabric storage organizer container things. If you knew me in real life, you’d probably be surprised to hear this because I ain’t exactly the queen of organization. I’m not even a princess. Heck, I’m more like the fourteenth assistant kitchen maid. Anyway, I love to look at pretty organizational bins at stores and imagine them beautifying my own castle…well scullery, I guess, if I’m just a kitchen maid. BUT, I never buy them. Because seriously, they cost a ridiculous amount for what they are. Boxes. Or wires. Covered in fabric. Not really worth it to this kitchen maid.

In addition to my cute canvas bin fascination, I have a red bookshelf in my home (yes it’s red on purpose) on which rests many books and four boring boxes – 2 black, 2 white – with “stuff” in them. I bought the boxes from IKEA for a different purpose and when that purpose had ended, they came to rest on the bookshelf. Now, what I really wanted was cute fabric-y boxes to match the aqua/red theme in that room. Couldn’t find anything I loved enough to spend money on. Pinterest to the rescue! (Of course.) There are a myriad of simple tutorials for covering an ordinary box to pretty it up. I happened to mostly use this one. Here’s the pin.

THE RESULTS

New and Improved “Cute” Boxes

Sorry, no before pictures – I didn’t think to take them until it was too late. As far as covering the boxes, I didn’t have any spray adhesive on hand, so I used Mod Podge. Just spread it on w/a standard cheapo sponge brush. Worked like a charm.

WHAT I LEARNED

*All of these people who say that 1 yard of fabric covered 2 diaper boxes must either 1-buy very small boxes of diapers, 2-have had much wider fabric than me or 3-be lying. Since I can’t imagine why someone would lie about such a thing, and since I can’t imagine why someone who has a child that poops and pees regularly would make a habit of buying small boxes of diapers instead of big ones, I’m going to go with numero 2. The boxes I covered were probably about half the size of your standard bigger box of diapers, so I figured a yard would cover 2 no problem. Riiiiiiiiiiiiiiiiiiiiight. They were about 5 inches too short! I decided to go ahead and slice those babies down the center to cover 2 boxes anyway and figure out what to do about the 1-2 inches exposed at the tops later.

*That huge run-on rambling up there just means that I learned you should measure before you buy fabric and assume it will work. Which goes against my nature, so I’ll just warn ya’ll about the perils of not measuring and go on with my standard mode of operation.

*I ought to have covered the black boxes w/the more blue fabric instead of the white-heavy one. Didn’t think that one through before charging ahead and now my daisies are a bit muted.

*Knitted stretch fabric isn’t the easiest thing to work with when you’re ironing and using Mod Podge and want straight lines. Now, in my defense, I hadn’t planned on using that fabric, but after the too short fiasco, it was the only white fabric I had on hand and I wanted to add a white band to the top (no, I did not line the whole thing, just the tops) and I certainly wasn’t heading back to the store for more. In the end, it worked out, but other choices would have been better.

—Side note on this one. I just realized that the tutorial I’m linking to doesn’t give instructions for just a top faux-liner and I can’t remember the one that did, so I’ll give the quickest rundown I can here.

First, measure the length all of the way around the top of the box. Add 4 or so inches. This is your length. Then decide how tall you want your “liner” to be and times that by 4. This is your width. Cut a piece of fabric to those measurements.

Iron it.

Fold it in half longways.

Iron it so there’s a crease in the center. Open it.

Fold one edge down to the crease.

Iron it.

Fold the other edge to the crease.

Iron it.

Now fold it in half again along that original crease.

Guess what you do next? That’s right. Iron it.

Viola. Now you basically have a really big binding. Glue it to your box. I glued the inside first and then went around and glued the outside. Your inside corners might be a little bunchy:

Inside Corner

It’s okay. Well, unless you’re OCD. Which, if you’re reading this post, it’s probably not such a good fit anyway. When you come back around to where you started, fold your end under an inch or 2 before gluing it down. Like so:

Where the “Lining” Ends

That’s it!

THE VERDICT

Well, I think they’re pretty cute, anyway. Certainly not professional, but good enough for who they’re for. :)

Our Week Frame

Standard

I really loved this little idea for a dry erase board of what’s going on during the week (and with paper that I could just change out whenever I feel so inclined – which means it will probably never change), so I shelled out the 11 or so buckaroos to my local Wallyworld to make it.

THE RESULT

WHAT I LEARNED

*I have a hard time paying $11 for something like this. Like I said before, I’m cheapo the ogre. I wonder how many posts I can squeeze the word “ogre” into…hmm…

*I need more cute paper.

*I really love having this.

THE VERDICT

It’s a keeper!